

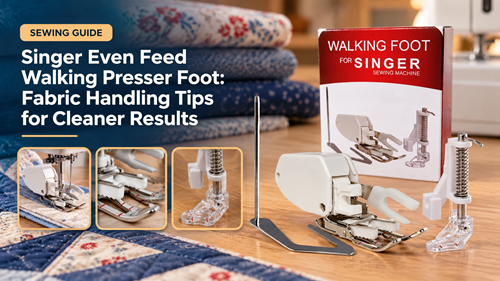
Singer even feed walking presser foot deserves a practical workflow check before it becomes part of a regular sewing, embroidery, serging, or transport routine. This guide is written for quilters working with layered fabrics and focuses on fabric handling tips for cleaner results. Instead of treating settings or accessories as isolated features, the goal is to build a repeatable process that can be tested on real materials, documented, and reproduced when the next project begins.
How To Plan The Singer Even Feed Walking Presser Foot Workflow
Begin with the finished result. Write down the material, seam or design type, finished dimensions, number of layers, required accessories, and the level of repeatability you expect. For quilters working with layered fabrics, this prevents a common mistake: changing machine settings before the real project requirements are clear.
A good workflow separates preparation from diagnosis. Prepare the machine or accessory correctly, create a baseline sample, and then change one variable at a time. If several things change at once, it becomes difficult to know whether the improvement came from threading, needle choice, feeding, tension, stabilizer, foot selection, or operator technique.
Use Singer even feed walking presser foot setup as the starting routine, then keep the same project materials and sequence long enough to tell whether a change really improves the result.
Singer Even Feed Walking Presser Foot Setup And Compatibility Checks
Confirm Mechanical Compatibility Before Sewing
A walking foot is driven by the needle-clamp movement, so physical fit matters. Check the machine model, shank style, fork position, and needle clearance before running the motor.
Support The Weight Of Layered Fabric
Large quilts and layered home projects can drag from the side of the table. Support the project close to the needle so the attachment feeds layers rather than fighting the weight of the entire piece.
Use A Longer, Straighter Path When Possible
Walking feet are strongest on straight or gently curved lines. Tight pivots and dense decorative patterns may be easier with a standard foot or another technique that gives more visibility and freedom.
Slow Down At Seams And Intersections
A bulky crossing can tilt the foot and change feeding. Approach slowly, keep the layers flat, and use leveling support if needed instead of forcing the project through the ridge.
Before adding fitted parts or changing the workflow, confirm Singer even feed walking presser foot compatibility against the exact model or attachment point. Similar-looking machines and accessories can differ in clearances, bobbins, feet, hoops, motors, or electrical details.
Plan Singer even feed walking presser foot accessories around the first projects you will actually make. Buy or prepare the items that solve a real setup problem instead of collecting extras that make the workstation harder to organize.
Build A Repeatable Project Workflow
Keep the test conditions close to the real job. Use the same fabric family, thread, needle, accessory or hoop, seam construction, and working speed whenever possible. A sample that is easier than the final project can hide the exact problem that later appears on a finished garment, gift, quilt, or customer order.
Evaluate Singer even feed walking presser foot stitch quality on repeatable samples, not on one lucky seam or stitch-out. Compare the front and back, transitions, corners, dense areas, and the result after the fabric is handled or stretched as it will be in use.
Build Singer even feed walking presser foot user tips into a short written checklist. A repeatable routine helps beginners and experienced users notice when a needle, thread, foot, hoop, feed setting, or preparation step changed between projects.
Turn Singer even feed walking presser foot project guide into two or three representative samples before committing to a larger batch. Those samples reveal whether the machine, accessory, or case fits the work rather than only fitting the product description.
Save the successful setup. A short note with material, thread, needle, stitch or design setting, foot or hoop, and any special preparation turns one good result into a repeatable system. That record is especially useful when the same project returns weeks later or another person needs to reproduce it.
A Practical Test Before The Full Project
- Verify the foot is designed to fit the machine and needle-clamp area.
- Install the attachment with the fork positioned correctly.
- Prepare a layered sample that matches the real project.
- Support the sample so its weight does not pull away from the needle.
- Sew straight lines and one bulky intersection at moderate speed.
- Compare layer alignment with the same sample sewn under a standard foot.
Judge the sample after the entire process, not only while the machine is running. Check the front and back, seam or design alignment, thread balance, fabric distortion, edge condition, stretch or recovery where relevant, and how the result looks after normal handling. If a problem appears, return to the baseline and make one controlled change.
What To Check At A Glance
| Project Or Symptom | Priority Check | Warning Sign |
|---|---|---|
| Quilt sandwich | Strong use case | Watch edge drift |
| Binding | Useful for multiple layers | Check corner bulk |
| Slippery fabric layers | Can improve control | Test surface marking |
| Tight decorative curves | Often less convenient | Visibility and pivoting may be limited |
Common Mistakes To Avoid
- Assuming every walking foot fits every machine
- Letting a large quilt hang off the table
- Using high speed at bulky intersections
- Forcing tight pivots that the attachment does not handle well
- Treating the foot as a substitute for correct basting or pinning
These mistakes are easy to make because they can produce a usable result once and still fail on the next project. Consistency comes from controlled preparation, documented settings, and realistic samples rather than from chasing a single “perfect” number.
Troubleshoot In A Fixed Order
When the result changes, start with the simplest reversible checks: threading or installation, needle or consumable condition, material preparation, bobbin or thread path, foot or hoop fit, feeding, and the normal user-adjustable settings. Only after those checks should you consider deeper mechanical causes. This order protects the machine from unnecessary adjustment and makes service information more useful.
For persistent problems, use Singer even feed walking presser foot troubleshooting together with the current manufacturer documentation. Record the exact symptom, material, setup, and changes already tested before making a mechanical adjustment or seeking service.
Take a photo of the sample and write down the conditions that produced it. That small record can save time when comparing a later test, asking a technician for help, or returning to a project after a long break.
Use The Singer Even Feed Walking Presser Foot With A Repeatable System
The best results from the Singer even feed walking presser foot come from matching the setup to a real project, testing the difficult part before the final piece, and recording the combination that works. For quilters working with layered fabrics, that approach reduces wasted material and makes it easier to separate a machine limitation from a preparation or compatibility problem.
Keep the process simple enough to repeat: prepare, test, inspect, change one variable, and save the final setup. That discipline is more useful than copying settings from a different fabric or project and gives the Singer even feed walking presser foot a fair test under the conditions that actually matter.
Frequently Asked Questions
When does the Singer even feed walking presser foot help most?
It is most helpful when multiple layers shift at different rates, such as quilt sandwiches, binding, or slippery layered fabrics.
Do I still need to baste or pin?
Usually yes. The foot improves feeding but does not replace good layer preparation and project support.
Can I sew tight curves with a walking foot?
Gentle curves are often manageable, but tight pivots may be easier with a different foot or quilting method.
Why does the fabric still creep with the foot installed?
Check installation, project weight, basting, presser-foot pressure where applicable, and whether the fabric is being pulled from the table.
What should I test before a large quilt?
Use a layered sample with the same top, batting, backing, thread, and seam intersections, then compare it with a standard-foot result.
