

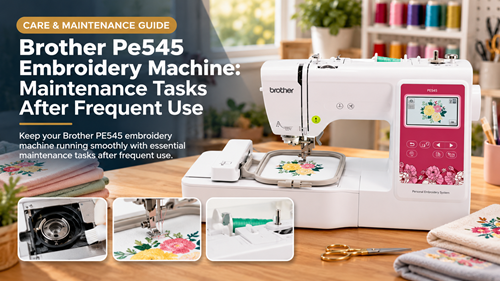
Brother PE545 embroidery machine deserves a practical workflow check before it becomes part of a regular sewing, embroidery, serging, or transport routine. This guide is written for personalized gift makers and focuses on maintenance tasks after frequent use. Instead of treating settings or accessories as isolated features, the goal is to build a repeatable process that can be tested on real materials, documented, and reproduced when the next project begins.
How To Plan The Brother PE545 Embroidery Machine Workflow
Begin with the finished result. Write down the material, seam or design type, finished dimensions, number of layers, required accessories, and the level of repeatability you expect. For personalized gift makers, this prevents a common mistake: changing machine settings before the real project requirements are clear.
A good workflow separates preparation from diagnosis. Prepare the machine or accessory correctly, create a baseline sample, and then change one variable at a time. If several things change at once, it becomes difficult to know whether the improvement came from threading, needle choice, feeding, tension, stabilizer, foot selection, or operator technique.
Use Brother PE545 embroidery machine setup as the starting routine, then keep the same project materials and sequence long enough to tell whether a change really improves the result.
Brother PE545 Embroidery Machine Setup And Compatibility Checks
Clean The Bobbin And Needle Area Regularly
Thread lint and stabilizer fibers collect where the stitch forms. Remove the needle plate or bobbin components only as directed, use the recommended brush or cleaning method, and avoid pushing debris deeper into the machine.
Replace Worn Needles Before They Create Problems
A needle can become dull or slightly bent without looking dramatic. Frequent embroidery, dense designs, adhesive stabilizer, or difficult fabric can shorten needle life, so replace the needle when stitch quality changes or after demanding runs.
Inspect Thread Path And Tension Discs
Repeated use can leave lint or thread fragments in guides and tension areas. Rethread from the beginning and verify the path before assuming a stitch-quality change requires a tension adjustment.
Maintain Hoops, Screens, And File Organization
Clean hoop surfaces, check screws and frames, and remove obsolete design files or duplicates from your workflow. Good digital housekeeping reduces setup errors just as physical cleaning reduces mechanical problems.
Before adding fitted parts or changing the workflow, confirm Brother PE545 embroidery machine compatibility against the exact model or attachment point. Similar-looking machines and accessories can differ in clearances, bobbins, feet, hoops, motors, or electrical details.
Plan Brother PE545 embroidery machine accessories around the first projects you will actually make. Buy or prepare the items that solve a real setup problem instead of collecting extras that make the workstation harder to organize.
Build A Repeatable Project Workflow
Keep the test conditions close to the real job. Use the same fabric family, thread, needle, accessory or hoop, seam construction, and working speed whenever possible. A sample that is easier than the final project can hide the exact problem that later appears on a finished garment, gift, quilt, or customer order.
Evaluate Brother PE545 embroidery machine stitch quality on repeatable samples, not on one lucky seam or stitch-out. Compare the front and back, transitions, corners, dense areas, and the result after the fabric is handled or stretched as it will be in use.
Build Brother PE545 embroidery machine user tips into a short written checklist. A repeatable routine helps beginners and experienced users notice when a needle, thread, foot, hoop, feed setting, or preparation step changed between projects.
Turn Brother PE545 embroidery machine project guide into two or three representative samples before committing to a larger batch. Those samples reveal whether the machine, accessory, or case fits the work rather than only fitting the product description.
Save the successful setup. A short note with material, thread, needle, stitch or design setting, foot or hoop, and any special preparation turns one good result into a repeatable system. That record is especially useful when the same project returns weeks later or another person needs to reproduce it.
A Practical Test Before The Full Project
- Finish the current project and power the machine off safely.
- Remove loose thread and lint from user-serviceable areas.
- Inspect the needle and replace it if wear is suspected.
- Check hoop screws, frames, cords, and visible accessories.
- Run a small reference design on scrap after maintenance.
- Record the date and any change in sound or stitch quality.
Judge the sample after the entire process, not only while the machine is running. Check the front and back, seam or design alignment, thread balance, fabric distortion, edge condition, stretch or recovery where relevant, and how the result looks after normal handling. If a problem appears, return to the baseline and make one controlled change.
What To Check At A Glance
| Project Or Symptom | Priority Check | Warning Sign |
|---|---|---|
| Bobbin area | Lint and thread fragments | Clean as manual allows |
| Needle | Dullness or bending | Replace when quality changes |
| Hoop | Loose screw or residue | Clean and inspect |
| Design files | Duplicates or wrong versions | Archive and rename clearly |
Common Mistakes To Avoid
- Using compressed air in a way that pushes lint deeper
- Oiling areas not specified for user maintenance
- Continuing with a damaged needle
- Adjusting tension before rethreading and cleaning
- Ignoring a new mechanical noise because stitches still form
These mistakes are easy to make because they can produce a usable result once and still fail on the next project. Consistency comes from controlled preparation, documented settings, and realistic samples rather than from chasing a single “perfect” number.
Troubleshoot In A Fixed Order
When the result changes, start with the simplest reversible checks: threading or installation, needle or consumable condition, material preparation, bobbin or thread path, foot or hoop fit, feeding, and the normal user-adjustable settings. Only after those checks should you consider deeper mechanical causes. This order protects the machine from unnecessary adjustment and makes service information more useful.
For persistent problems, use Brother PE545 embroidery machine troubleshooting together with the current manufacturer documentation. Record the exact symptom, material, setup, and changes already tested before making a mechanical adjustment or seeking service.
Take a photo of the sample and write down the conditions that produced it. That small record can save time when comparing a later test, asking a technician for help, or returning to a project after a long break.
Use The Brother PE545 Embroidery Machine With A Repeatable System
The best results from the Brother PE545 embroidery machine come from matching the setup to a real project, testing the difficult part before the final piece, and recording the combination that works. For personalized gift makers, that approach reduces wasted material and makes it easier to separate a machine limitation from a preparation or compatibility problem.
Keep the process simple enough to repeat: prepare, test, inspect, change one variable, and save the final setup. That discipline is more useful than copying settings from a different fabric or project and gives the Brother PE545 embroidery machine a fair test under the conditions that actually matter.
Frequently Asked Questions
How often should I clean the Brother PE545 embroidery machine?
Base cleaning on use and material. Frequent embroidery with linty fabric or stabilizer can require more frequent inspection than occasional light projects.
Should I oil the machine myself?
Follow the current Brother manual. Do not add oil to areas unless the manufacturer specifically instructs the user to do so.
When should I replace the embroidery needle?
Replace it when it is bent, damaged, dull, or when stitch quality changes after a demanding project. A fresh needle is inexpensive troubleshooting.
Can maintenance fix thread breaks?
Cleaning and a fresh needle can help, but also verify threading, thread quality, bobbin setup, stabilizer, and the design itself.
When should I seek service?
Seek service for persistent unusual noise, repeated needle strikes, mechanical resistance, or stitch problems that remain after correct cleaning, threading, and needle replacement.
