

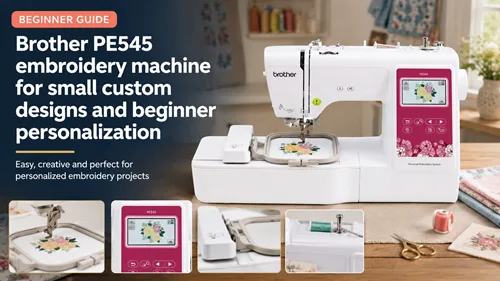
The Brother PE545 embroidery machine is built around a compact 4×4 embroidery workflow that suits beginners making monograms, patches, small gift designs, and personalized accents. A small field can actually make learning easier because it encourages manageable projects and faster test samples. The important part is understanding how wireless transfer, design size, hoop placement, lettering, stabilizer, and on-screen editing work together so a beginner can move from a downloaded or built-in design to a clean finished item without unnecessary trial and error.
How To Evaluate The Brother PE545 Embroidery Machine
The 4×4 field is best viewed as a project filter. It encourages small monograms, patches, pocket-size graphics, simple towel designs, baby-item accents, and compact gift motifs. If your main goal is large jacket backs or wide multi-line names, a larger field may suit you better from the start.
Beginners should also consider how designs reach the machine. A simple file-transfer process removes one source of confusion, but you still need to confirm format, dimensions, orientation, and placement. Wireless transfer is convenient only when the file system itself is organized.
Features And Setup That Matter In Real Use
Learn Hooping Before Chasing More Designs
A perfectly chosen design can still fail if the fabric is stretched, crooked, or poorly stabilized in the hoop. Practice centering, tensioning, and securing the material on inexpensive samples until the fabric stays flat without being distorted.
Use The Screen For Small Placement Corrections
On-screen editing can help reposition, rotate, or adjust supported designs, but it should not replace accurate physical marking. Mark the center and top orientation on the blank first, then use the screen for fine correction rather than guessing the entire placement digitally.
Test Monograms At Their Finished Size
Lettering that looks clear on a display may stitch differently on textured towels, knit fabric, or dense woven material. Test the actual name length and height with the intended thread and stabilizer before committing a customer or gift item.
Keep Beginner Projects Repeatable
Choose a small group of blanks—such as patches, towels, simple totes, or fabric gift items—and repeat them. Repetition teaches hooping and thread behavior faster than changing fabric, design style, and project type every session.
Build A Workflow Around The Project, Not The Marketing Label
A reliable PE545 4×4 hoop workflow starts with a printed or measured placement mark, correct stabilizer, and a design that leaves some margin inside the field. Avoid placing important stitches right at the limit because small hooping differences can make alignment stressful.
Use Brother PE545 wireless transfer only with a clean file-naming system. Brother’s official PE545 information describes wireless LAN capabilities; keep one final machine-ready version of each project so an old edit is not accidentally sent and stitched.
For PE545 monogram projects, choose fonts with enough stroke width to remain readable at small sizes. Test initials and longer names separately because spacing and density can change significantly when the lettering string becomes wider.
With PE545 custom patch making, stabilize the base material firmly and plan the border before stitching. A clean patch needs a controlled edge, suitable backing, and a design that remains readable at the final size instead of relying on very fine interior detail.
The PE545 embroidery learning curve becomes easier when you repeat the same project type several times. Keep notes on needle, stabilizer, thread, hooping method, and any placement adjustment so each sample teaches you something that carries into the next one.
Combine PE545 design editing basics with file-format discipline. Brother support documents embroidery formats for compatible machines, and the machine manual should be the final check before importing third-party designs or resizing files from another source.
Complete One Beginner Project From Start To Finish
- Choose a 4×4 design with comfortable margin around the stitch field.
- Mark the center and top orientation on a simple stable blank.
- Apply the stabilizer and hoop without stretching the fabric.
- Transfer or select the design and confirm the preview before stitching.
- Stitch the sample while noting thread changes, tension behavior, and any puckering.
- Save the successful file and write down the stabilizer, thread, and placement measurements.
Beginner Projects For A PE545 Workflow
| Project | Why It Works | Skill You Practice |
|---|---|---|
| Monogram towel | Small defined placement | Lettering and centering |
| Patch | Controlled 4×4 area | Density and borders |
| Tote accent | Flat hoopable panel | Placement |
| Gift napkin | Simple repeatable blank | Consistency |
| Pocket-size motif | Compact design | Editing and orientation |
Common Mistakes That Reduce Results
- Buying designs without checking 4×4 dimensions
- Stretching fabric tightly in the hoop
- Making lettering too small for the material
- Sending multiple file versions with unclear names
- Changing too many variables between test samples
Beginner embroidery improves fastest when you can explain why a sample changed. Keep the fabric and stabilizer constant while testing one setting or design adjustment at a time, then save the version that worked.
Check Manufacturer Guidance Before Final Setup
Brother’s official PE545 product page lists the current 4×4 embroidery area, wireless functionality, built-in design and font information, and other manufacturer specifications. Use the official manual for detailed operating and maintenance instructions.
Grow Into The Brother PE545 Embroidery Machine One Small Project At A Time
The Brother PE545 embroidery machine is easiest to learn when you keep the first projects small, repeatable, and well documented. A clean 4×4 monogram or patch teaches more useful control than a complicated design that pushes every limit at once.
Build confidence in hooping, transfer, stabilizer, and lettering before expanding the project list. Once those basics become routine, the Brother PE545 embroidery machine can support a steady stream of personalized gifts and small custom designs without making every session feel like a new setup.
Frequently Asked Questions
What is the maximum embroidery area of the Brother PE545?
Brother currently lists a 4×4 maximum embroidery area.
Does the PE545 have wireless transfer?
Brother lists wireless LAN functionality for the PE545. Follow the official setup instructions for your network and transfer software.
Is the PE545 a sewing and embroidery combination machine?
No. It is an embroidery-focused machine, so normal garment construction requires a separate sewing machine.
What should I embroider first?
A simple monogram, small patch, towel accent, or flat tote design is a manageable way to practice hooping and placement.
Can I resize any design to fit 4×4?
Not safely. Large dense designs may not stitch well when reduced. Use designs digitized for the intended finished size.
