

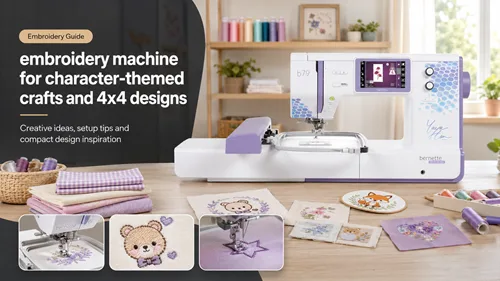
An embroidery machine with a 4×4 field can produce a surprising range of character-themed crafts, names, patches, small motifs, and children’s-item personalization when the design is chosen for the available space. The limitation is not just the hoop frame: the design’s stitch field, density, orientation, fabric support, and safe placement all matter. Beginners get better results by planning small projects around the machine’s real embroidery area instead of shrinking large artwork until the details become too dense to stitch cleanly.
How To Evaluate The Embroidery Machine
A 4×4 embroidery field is well suited to small chest motifs, monograms, simple patches, bibs, selected children’s accessories, small bag panels, and decorative fabric pieces. It becomes restrictive when you want wide names, large jacket backs, oversized appliqué, or complex scenes. Match the project to the field rather than forcing the field to match the project.
For character-themed work, design quality matters more than visual complexity. Clean outlines, readable shapes, sensible color changes, and sufficient spacing usually stitch better at small sizes than artwork with many tiny details. If a design only looks correct when heavily zoomed on a screen, it may not translate well to thread.
Features And Setup That Matter In Real Use
Start With The Maximum Stitch Field
Confirm the machine’s maximum embroidery area and the usable hoop options before purchasing designs. A physical hoop may be larger than the actual stitch field, and a design can be rejected even when it appears to fit inside the plastic frame.
Choose Stabilizer For The Item
A stable woven patch, stretchy shirt, towel, and thin bag panel behave differently. Match stabilizer and topping to the fabric so the stitches stay on the surface without stretching, tunneling, or sinking into texture.
Simplify Small Character Details
Small eyes, outlines, lettering, and color boundaries need enough space to stitch cleanly. Use designs created for the intended size instead of shrinking a large dense file far below its original dimensions.
Keep Personalization Away From Safety Hazards
On children’s items, avoid placements where stiff embroidery, loose trims, or rough backing can irritate skin or create an unsuitable surface. The finished craft should be evaluated as an item being worn or handled, not just as an embroidery sample.
Build A Workflow Around The Project, Not The Marketing Label
Plan 4×4 embroidery projects around a design that fits naturally in the field: small patches, monograms, simple motifs, bib corners, pocket-size graphics, and compact bag panels. Leaving breathing room around the design usually produces a more polished result than filling every millimeter.
For character design ideas, build original themes from shapes, animals, initials, icons, colors, and simple decorative elements, or use artwork you are licensed to reproduce. A clear concept with fewer strong details often stitches better than a crowded miniature illustration.
When comparing Brother hoop size, distinguish between hoop dimensions and maximum stitch area. Check the manual and design screen for the true supported field before ordering a design that sits close to the limit.
Test lettering patterns at the actual finished size. Small letters need adequate stroke width and spacing, and textured fabric may require topping or a bolder font. Save the approved sample so future names can follow the same proportions.
For kids craft personalization, choose blanks that can be hooped without stretching and place embroidery where it will be comfortable in use. Keep backing tidy, trim threads carefully, and check that the finished item remains appropriate for the child’s age and intended use.
A good beginner embroidery setup includes file-format checks before the design reaches the machine. Brother support documents common embroidery formats for compatible models; verify the exact manual for your machine and avoid assuming that every downloaded design will be recognized.
Test A 4×4 Design From File To Finished Sample
- Confirm the design dimensions are within the machine’s actual stitch field.
- Choose a stable scrap or sample blank that behaves like the finished item.
- Apply the appropriate stabilizer and hoop without stretching the fabric.
- Load the file and verify orientation, color sequence, and placement preview.
- Stitch at a controlled speed and watch for puckering, thread breaks, or dense areas.
- Inspect the back, trim cleanly, and save the successful setup with the design file.
Small Embroidery Projects That Fit A 4×4 Workflow
| Project | Design Strategy | Main Check |
|---|---|---|
| Monogram | Bold readable lettering | Letter spacing |
| Small patch | Simple border and motif | Edge density |
| Bib corner | Compact soft-backed design | Comfort and backing |
| Bag panel | Centered simple graphic | Hoop access |
| Pocket motif | Small clean icon | Placement accuracy |
Common Mistakes That Reduce Results
- Shrinking a large dense design to fit 4×4
- Confusing hoop frame size with stitch field
- Using the same stabilizer on every fabric
- Ignoring licensing for recognizable characters
- Placing stiff embroidery where it rubs against skin
Small-field embroidery rewards restraint. A clean design that is properly stabilized and placed will usually look more professional than a complex image that has been compressed beyond the scale it was digitized to handle.
Check Manufacturer Guidance Before Final Setup
Brother support provides embroidery format guidance for compatible models. File support varies by machine, so confirm the exact manual and model documentation before purchasing third-party designs or transferring a new format.
Choose An Embroidery Machine Workflow That Makes 4×4 Crafts Look Intentional
An embroidery machine does not need a very large field to make useful personalized crafts. A 4×4 workflow can be efficient when the design was created for the scale, the blank is easy to hoop, and the placement is planned before stitching.
Start with simple originals, readable lettering, stable fabrics, and repeatable projects. As your design library and hooping skill improve, you will learn which ideas belong comfortably inside a small field and when a larger embroidery machine would genuinely expand what you can make.
Frequently Asked Questions
What can I make with a 4×4 embroidery area?
Monograms, small patches, pocket-size motifs, bib or towel accents, bag panels, and other compact designs are common choices.
Can I shrink any embroidery design to 4×4?
No. Large designs may become too dense or lose important detail when reduced too far. Use a file digitized for the intended size.
Which embroidery file format should I use?
It depends on the exact machine. Check the manufacturer manual or support page for supported formats before transferring a design.
Can I embroider licensed cartoon characters for sale?
Only when you have the appropriate rights or license. Creating or selling unlicensed copies of protected characters can raise intellectual-property issues.
Why does my small design pucker?
Possible causes include unsuitable stabilizer, overly dense stitching, stretched fabric, tension issues, or a design not digitized well for the material.
