

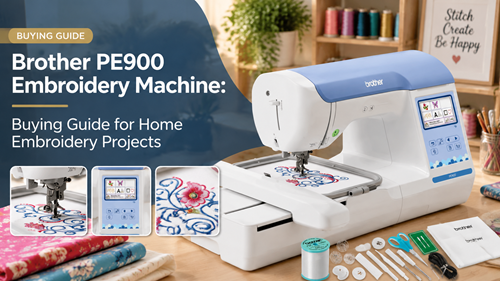
The Brother PE900 Embroidery Machine should be judged by the work it will do in a real sewing or embroidery space, not by a feature list alone. This guide is written for home embroiderers comparing a dedicated machine for personalized craft projects. It focuses on project fit, setup, workflow, material handling, repeatability, and the practical checks that prevent a machine from becoming an expensive mismatch. Brother lists the PE900 as an embroidery-only model with a 5 x 7 inch maximum embroidery area, wireless LAN, built-in designs and fonts, and on-screen editing. Those features are most useful when the hoop size and transfer workflow match the projects you actually plan to make.
How To Evaluate The Brother PE900 Embroidery Machine
Start with the project list rather than the machine label. Write down the fabrics, finished sizes, seam or embroidery demands, accessories, and weekly volume you expect during the next six months. A model can be excellent in its intended role and still be the wrong purchase when the real work falls outside that role.
Brother lists the PE900 as an embroidery-only model with a 5 x 7 inch maximum embroidery area, wireless LAN, built-in designs and fonts, and on-screen editing. Those features are most useful when the hoop size and transfer workflow match the projects you actually plan to make.
Use this PE900 embroidery setup as a practical reference point, then compare it with the exact material, hoop, seam or workstation demands of your own projects.
A useful second check is dedicated embroidery machine for home because it helps place the machine inside a broader workflow rather than treating one product page as the entire buying decision.
Features And Setup That Matter In Real Use
Plan Around the 5 X 7 Field
Measure the finished design before choosing a blank. A 5 x 7 field gives useful room for names and medium motifs, but seams, pockets and bulky edges can still limit where the hoop can sit.
Make Wireless Transfer Part of a File System
Wireless transfer saves time only when the final stitch file is clearly named and separated from draft versions. Keep the approved size, thread order and placement note with each project.
Treat Stabilizer as Part of the Design
Towels, knits, woven cotton and bags do not need the same backing. Test the actual blank with the planned needle, thread and stabilizer before producing a gift or paid order.
Use Screen Editing for Fine Adjustments
On-screen positioning and editing are useful for small corrections, but physical center marks should still control placement. Mark the blank first, then use the display for refinement.
Build A Repeatable Workflow Before You Buy
Plan embroidery hoop planning around a real sample instead of a showroom demonstration. Measure or mark the critical dimensions first and keep a written record of the setup that produced the best result.
For machine embroidery project ideas choose two or three representative projects and run them from preparation through finishing. The goal is to discover where setup time, workspace, feeding, hooping or file handling slows the process.
Keep a small reference notebook or digital note for successful combinations of needle, thread, foot or hoop, stabilizer, tension, stitch settings, and placement measurements. Repeating a known setup is faster and more reliable than rediscovering it for every project.
Run A Practical Test Before Committing
- Choose one realistic 5 x 7 design and print or measure its finished dimensions.
- Prepare the exact blank, stabilizer, needle and thread planned for regular use.
- Mark the design center and top orientation on the blank before hooping.
- Transfer the final file and confirm size, rotation and color sequence on the machine.
- Stitch the entire sample while noting thread breaks, puckering and registration.
- Save the successful file and record the hoop, stabilizer and placement measurements.
A good test should be difficult enough to reveal the machine’s limits but representative enough to matter. Do not base the decision on a demo material, speed setting, or design that is easier than the projects you plan to make at home or in a small business.
Project Fit At A Glance
| Project Or Use | Fit | What To Check |
|---|---|---|
| Monogram towel | Lettering size and topping | Texture can swallow fine stitches |
| Tote bag | Flat hoop access | Seams can block the hoop |
| Baby gift | Soft backing and placement | Dense designs may feel stiff |
| Patch | Border and density | Small details can close up |
Turn The Feature List Into A Buyer Checklist
Use a PE900 buyer checklist that covers the exact bundle, accessories, consumables, workspace, support, and material or design limits you will depend on after purchase.
Your home embroidery workflow should also include storage, cleanup, repeat setup, and the time needed to prepare the next project. A machine that fits the whole routine is more valuable than one that only performs well during a short demo.
Compare the current seller listing with the manufacturer information before payment. Packages, included feet, hoops, software, tables, motors, colors, and accessories can change, so the model name alone is not enough to prove that two listings are identical.
Common Buying And Setup Mistakes
- Buying designs before checking the 5 x 7 field
- Using the same stabilizer for every fabric
- Overwriting approved files with later edits
- Estimating placement without center marks
- Testing directly on a valuable blank
When a test result is disappointing, change one variable at a time. Re-thread, verify the needle or design file, confirm the foot or hoop, and repeat the same sample. That approach separates a setup problem from a true machine limitation.
Verify The Current Manufacturer Information
Before ordering, review the manufacturer information for Brother PE900 Embroidery Machine. Use the current manual and support material as the final authority for specifications, compatible accessories, setup steps, safety, maintenance, and any model-specific limitations.
Choose The Brother PE900 Embroidery Machine For The Work You Actually Do
The Brother PE900 Embroidery Machine makes the most sense when its strongest workflow aligns with personalized towels, tote bags, monograms, medium chest designs, nursery gifts, patches, and repeatable home craft projects. A careful buyer should be able to describe the first several projects, the workspace, the accessories or files required, and the hardest realistic test before clicking buy.
Use that test-first approach and the Brother PE900 Embroidery Machine becomes easier to evaluate on practical evidence rather than marketing language. The best choice is the machine that produces repeatable results with a setup you are willing to use every week.
Frequently Asked Questions
Is the Brother PE900 a sewing and embroidery combination machine?
No. It is designed for embroidery, so normal garment construction still requires a separate sewing machine.
What size designs fit the PE900?
Brother lists a maximum embroidery area of 5 x 7 inches. The actual design should leave sensible margin inside that field.
Can the PE900 receive designs wirelessly?
Brother lists wireless LAN and compatible transfer workflows. Follow the current Brother setup instructions for the computer or app you use.
Is a 5 x 7 hoop enough for home gifts?
It is enough for many monograms, towel motifs, patches, tote designs and medium personalized projects, but not every large design.
What should I test first after setup?
Run one complete project on scrap using the exact stabilizer, thread and hooping method you intend to repeat.
