

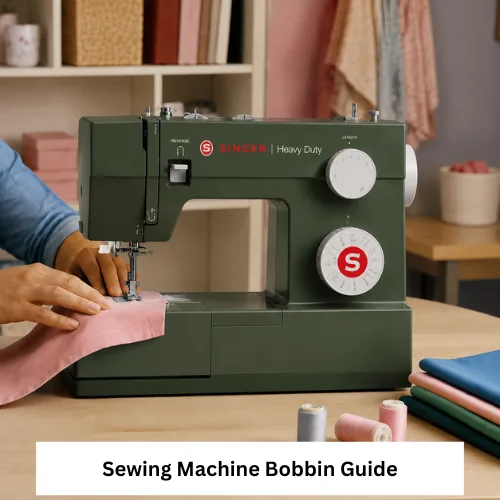
Choosing the correct sewing machine bobbin is essential for balanced stitches, smooth thread delivery, and reliable operation. A bobbin that is slightly different in height, diameter, shape, or material can cause poor tension, noise, jams, or damage even when it appears to fit.
Buyers should identify the machine model, required bobbin class, bobbin-case style, and approved material before ordering. This guide explains bobbin sizes, compatibility, winding, insertion, tension, troubleshooting, maintenance, and what to verify before buying.
How to Choose a Sewing Machine Bobbin
Start with the machine manual or the manufacturer’s parts information. Look for the exact bobbin class or part number, not only a general label such as universal. Common classes may look similar but are not necessarily interchangeable.
Measure an old bobbin only as a secondary check. Diameter, height, center-hole shape, flange profile, and material can all matter. If the original bobbin is worn, distorted, or not confirmed as correct, do not use it as the sole buying reference.
A sewing machine accessory kit may include useful extras, but verify the exact bobbin class, quantity, and material before buying.
| Bobbin or system | Typical feature | Buyer advantage | What to verify |
| Top drop-in bobbin | Loads from the top under a clear or removable cover | Easy thread-level viewing on many machines | Required class, insertion direction, and cover fit |
| Front-loading bobbin | Fits into a removable bobbin case | Familiar tension and case system on many mechanical machines | Case style, latch condition, and bobbin dimensions |
| Metal bobbin | Rigid metal construction | Durable when specified for the machine | Never substitute for plastic unless approved |
| Plastic bobbin | Lightweight molded construction | Common in many modern machines | No cracks, warping, rough edges, or incorrect profile |
| Prewound bobbin | Arrives filled with thread | Convenient for repeated work | Class, thread type, winding density, and machine approval |
Bobbin size and class
Terms such as Class 15, 15J, L, and M describe different bobbin formats. Similar names or diameters do not guarantee the same fit. Confirm the exact designation in the manual and verify before buying.
Bobbin material
Do not replace a specified plastic bobbin with metal, or metal with plastic, unless the manufacturer states that both are compatible. Weight and profile can affect rotation, sensing systems, and tension.
Bobbin case compatibility
A removable bobbin case must match the machine’s hook system and orientation. Check the case part number, finger or position bracket, tension spring, latch, and overall condition. A new bobbin will not correct a damaged or incorrect bobbin case.
When shopping for sewing machine parts and accessories, compare the listed part numbers with the machine model and manual rather than relying on appearance alone.
How to Wind a Bobbin Correctly
Use the bobbin recommended for the machine. Place the thread spool and cap as directed, route the thread through the bobbin-winding guide, and pass it through the bobbin hole or slot in the stated direction.
Engage the bobbin winder fully. Hold the thread tail only as the manual directs, begin at moderate speed, then trim the tail safely after the first wraps if required. Stop when the machine or bobbin winder indicates the bobbin is full.
A sewing machine bobbin should be wound evenly from side to side without loose sections, crossed loops, or a cone-shaped buildup. Do not overfill it beyond the flange.
A Singer sewing machine accessory kit may be convenient for owners of compatible models, but the included bobbins and tools should be checked against the exact machine model before use.
Signs of poor winding
Uneven winding, soft layers, bulging thread, and crossed loops can produce irregular feed or jams. Rewind the bobbin rather than trying to force a badly wound one to work.
If the winder fills only one side, check that the bobbin is seated fully and the thread follows the correct guide. Some machines allow winder alignment adjustment, but follow the service guidance rather than bending parts.
Installing the Bobbin and Bobbin Case
Switch off and unplug the machine before working near the needle, hook, or bobbin case. Raise the needle to its highest position and follow the manual for removing the cover or case.
For a drop-in bobbin, place it so the thread unwinds in the specified direction, pull the thread through the slot and tension path, and reinstall the cover correctly. For a front-loading system, insert the bobbin into the case, route the thread under the tension spring, then lock the case into the hook assembly.
Turn the handwheel slowly toward you through a full cycle to pick up the bobbin thread and confirm free movement. Stop if you hear scraping, feel resistance, or see the bobbin case move out of position.
A beginner sewing machine accessory kit can help organize basic tools, but buyers should verify that any included bobbins match their machine rather than assuming they are universal.
Understanding Bobbin Tension
Bobbin tension controls resistance on the lower thread. Most routine stitch problems should be checked first through correct upper threading, needle condition, bobbin insertion, and normal upper-tension settings.
Do not adjust the bobbin-case screw casually. A very small movement can change stitch balance, and some drop-in systems are not intended for routine user adjustment. Follow the manual or qualified service guidance.
To evaluate tension, sew on a scrap with the same fabric, thread, needle, and layers as the final project. The upper and lower threads should lock within the material. Decorative embroidery may use a different balance from garment construction, so use project-specific guidance.
Common Bobbin Problems and Fixes
Thread nests under the fabric
Stop sewing and cut the thread without pulling the fabric hard. Rethread the upper path with the presser foot raised when required, confirm the take-up lever is threaded, and reinstall the bobbin in the correct direction.
Bobbin thread will not pick up
Check that the needle is inserted correctly, the bobbin case is locked in place, and the thread tail is long enough. Turn the handwheel in the correct direction and inspect for a bent needle or incorrect bobbin.
Bobbin rattles or spins unevenly
Remove it and verify class, material, winding, and case condition. A bobbin that is too small, warped, cracked, or incorrectly profiled can move excessively.
Bobbin thread shows on top
Confirm upper threading and tension before changing bobbin tension. Also check whether the upper and bobbin threads differ greatly in thickness.
Machine jams around the bobbin case
Switch off power. Remove loose thread and lint as the manual permits, inspect the needle and case, and never force the handwheel. Seek service if the hook, case, or retaining parts appear damaged or displaced.
A well-organized sewing supplies set can keep cleaning brushes, spare needles, and approved bobbins together, but verify every replacement part before it enters the machine.
Cleaning, Storage, and Replacement
Remove lint from the hook and bobbin area at the intervals recommended by the manufacturer. Use the supplied brush or an approved tool. Avoid blowing debris deeper into the machine, and apply oil only if the manual specifically instructs it.
Inspect bobbins for cracks, bent flanges, burrs, rust, heat distortion, and rough edges. Discard damaged bobbins because they can catch thread or rotate unevenly.
Store bobbins by class and thread type in labeled compartments. Keep wound bobbins covered to reduce dust and tangling. Small-business users can label bobbins by color code, fiber, and job to reduce setup errors.
Common Bobbin Buying Mistakes
A common mistake is buying a pack labeled universal without checking the machine manual. Other errors include mixing similar classes, substituting metal and plastic, reusing damaged bobbins, and assuming every accessory kit contains the correct size.
Buyers should also check pack quantity, material, return policy, delivery protection, replacement availability, and support. Verify before buying if the listing omits dimensions, class, part number, or compatible models.
Practical Bobbin Buying Checklist
- Identify the exact machine brand and model.
- Confirm bobbin class, part number, diameter, height, and profile.
- Verify whether the machine requires plastic, metal, or another specified material.
- Check top drop-in, front-loading, or removable bobbin-case compatibility.
- Inspect build quality for smooth edges, flat flanges, and consistent molding.
- Confirm safe winding, insertion direction, and thread-path instructions.
- Plan regular lint cleaning and damaged-bobbin replacement.
- Check warranty or seller support where applicable.
- Review return policy before opening a multipack when possible.
- Confirm replacement bobbins and bobbin cases remain available.
- Check delivery packaging for protection against bending or cracking.
- Verify before buying when any fit or compatibility detail is missing.
Conclusion
The correct sewing machine bobbin must match the machine’s class, material, case, and winding system. Confirm the manual, wind evenly, insert it in the correct direction, and avoid unnecessary bobbin-tension adjustments. American sewing machine helps buyers compare machines and compatible sewing accessories while keeping fit checks central to the purchase.
FAQ
Are all sewing machine bobbins the same size?
No. Bobbins can differ in class, height, diameter, profile, center hole, and material. Check the machine manual.
Can I use a metal bobbin instead of plastic?
Only when the machine manufacturer confirms compatibility. Material and weight can affect operation and sensing.
Why is my bobbin thread bunching underneath?
Incorrect upper threading is a common cause. Rethread, check the needle, and reinstall the bobbin in the correct direction.
How full should I wind a bobbin?
Fill it evenly without winding thread beyond the flange. Stop at the machine’s normal full-bobbin point.
Should I adjust the bobbin-case tension screw?
Not until threading, needle, bobbin fit, and upper tension are checked. Follow the manual or service guidance.
