
Sergers & Overlock Machines
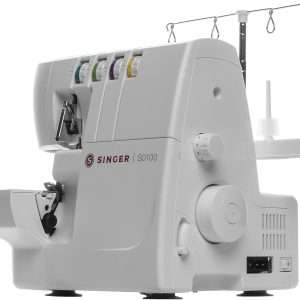
SINGER | S0100 White Overlock Serger with 2/3/4 Thread Capacity and 1300 SPM
Detail Description
Mastering the White Overlock Serger: A Comprehensive Guide for Beginners
Are you ready to elevate your sewing game? You’ve got a treat if you’ve recently added a White Overlock See you’re to toolkit. With simple techniques, this incredible machine can transform your fabric work from basic to breathtaking. Mastering the serger is essential to finishing seams, creating rolled hems, or adding that professional touch to your projects.
For beginners, the world of overlocking might seem daunting at first glance. But fear not! With this comprehensive guide tailored specifically for the White Overlock Serger, you’ll quickly gain confidence and skill. From understanding its functions and features to troubleshooting common issues, we have covered you every step of the way. Let’s dive into this exciting journey of creativity and craftsmanship!
Understanding the Basic Functions and Features
The White Overlock Serger is a versatile machine that enhances your sewing experience. At its core, it performs overlocking stitches that prevent fabric edges from fraying. This feature is essential for achieving professional-looking seams.
One of the standout functions is the ability to sew multiple threads simultaneously. Most models use three or four threads, allowing for more robust and elastic seams. You’ll appreciate how this flexibility accommodates various fabrics, from delicate silks to sturdy denim.
Another key feature is the differential feed mechanism. This adjusts the fabric feeding speed, ensuring even stitching and preventing puckering on stretchy materials like knits.
Take advantage of stitch options! The serger offers several types of stitches—from narrow to rolled hems—making it suitable for diverse projects. Understanding these basic features will set you on a path toward confidently mastering your White Overlock Serger.
Essential Tools and Accessories for Using a Serger
Having the right tools and accessories is crucial to get the most out of your White Overlock Serger. Start with a good pair of fabric scissors. Clean cuts make threading easier.
Next on the list is a serger foot pedal. This essential accessory offers better speed control, allowing for smooth stitching even on tricky fabrics.
Consider investing in extra spools of thread in various colors. Matching threads can elevate your projects instantly, providing that professional touch.
A seam gauge will help ensure precise measurements while trimming seams or hems. Consistency is crucial for achieving polished results.
I don’t remember needles! Keep an assortment handy to accommodate different materials—from knits to light wovens—so you’re always prepared for any project.
How to Set Up and Thread the Serger
Setting up your White Overlock Serger can feel daunting, but with patience, you’ll master it in no time.
Start by placing the machine on a flat surface. Ensure that it’s plugged in and powered on. Familiarize yourself with the threading diagram on the front or side of your serger. This visual guide is invaluable.
Next, gather your threads: Four spools are standard for most projects. Begin with the lower looper thread and carefully follow its path through all guides and tension discs, as shown in the diagram.
After that, move to the upper looper and repeat this process. For needle threads, insert them last into their respective needles after threading both loopers.
Remember to test stitch on scrap fabric before diving into your project! Adjust if necessary until everything runs smoothly without snags or skipped stitches.
Tips for Achieving Perfect Tension and Stitching
Achieving perfect tension on your White Overlock Serger can elevate your sewing projects. Start by adjusting the tension dials according to the fabric you’re using. Lower tensions work wonders for lightweight materials, while heavier fabrics may require a firmer grip.
Always test your settings with scrap fabric before diving into the main project. This will help you fine-tune any adjustments without risking valuable material.
Pay attention to thread quality, too. Using good-quality threads ensures smoother stitching and reduces fraying or breaking.
If you’re experiencing uneven stitches, check for proper threading; misthreading is expected to create tension issues.
Remember that practice makes perfect! Regularly use your serger to build muscle memory around these adjustments and techniques for seamless results every time you sew.
Advanced Techniques for Professional-Looking Finishes
Mastering advanced techniques on the White Overlock Serger is essential to elevate your sewing projects. One effective method is using rolled hems, which result in delicate and polished edges perfect for lightweight fabrics.
Experiment with different stitch settings to create various finishes. For example, a 3-thread overlock can provide a narrow finish while maintaining stretch—ideal for knits.
Another technique involves color-matching threads for a seamless look. This attention to detail enhances the overall appearance of your garments or home decor items.
Incorporating differential feed adjustment can also transform your fabric handling. This feature prevents stretching or puckering, ensuring smooth seams even on tricky materials like velvet or silk.
Consider adding decorative elements such as piping or lace trims during serging. Combining these features will enrich the aesthetic and showcase your skills as an aspiring seamstress.