Detail Description
The Ultimate Guide to Using the Singer Stitch Sew Quick Portable Mending Machine
Would you like to avoid dragging out your bulky sewing machine whenever you need a quick fix? The Singer Stitch Sew Quick Portable Mending Machine is a game-changer for repairs on the go! We will show you how to use this handy tool step-by-step and share some tricks and tips to keep it running smoothly. Get ready to make mending fast, easy, and stress-free!
Step 1: Unboxing and Assembly
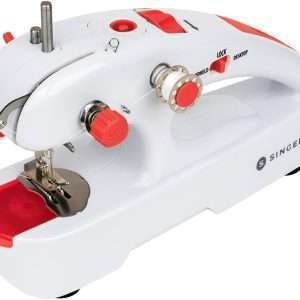
The Singer Stitch Sew Quick Portable Mending Machine includes everything you need to get started: the machine itself, a needle threader, two needles, three bobbins, and a threading guide. Remove all the items from the box and lay them flat.
Next, insert the threaded spindle into the top of the machine and secure it in place with the screw provided. Then, insert one of the bobbins onto the bobbin spindle on the side of the machine. Push it all the way down until it clicks into place.
Step 2: Threading
Threading this mending machine is quick and easy. Begin by placing your spool of thread onto the spindle and pulling out enough to reach through all the threading points. Next, follow these steps:
– Bring your thread down and around the tension control knob.
– Thread your thread through one of the pre-threaded holes in your needle.
– Pull your thread through until about six inches are left hanging from your needle.
– With your needle still threaded, pull your thread down through another hole in front of your needle.
Step-by-Step Guide on How to Use the Singer Stitch Sew Quick
So, you’ve got your hands on the Singer Stitch Sew Quick Portable Mending Machine and are ready to tackle those sewing projects efficiently. Let’s dive into a step-by-step guide on making the most of this handy tool.
First, 4 AA batteries should be inserted into the machine following the indicated polarity. Next, thread your needle by placing the thread through the eye from back to front, leaving a tail at least 3 inches long. Then, pass the thread under and through the groove in the front of the needle holder.
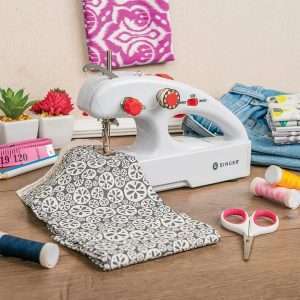
Hold your fabric under the presser foot when your machine is threaded. Press down on the power switch to start stitching – remember to control the speed with hand pressure as needed. Trim excess threads once you finish sewing for a clean result.
Tips and Tricks for Maintaining and Getting the Most Out of Your Machine
Now that you have mastered using the Singer Stitch Sew Quick Portable Mending Machine, you must know how to maintain and get the most out of your trusty tool. By following these tips and tricks, you can ensure your machine stays in top condition for all your sewing needs.
Clean your machine regularly. Dust and lint can build up over time, affecting its performance. Use a small brush or a vacuum cleaner with a nozzle attachment to remove debris from the machine.
Next, oiling your machine is crucial for smooth operation. Follow the manufacturer’s instructions on how often to oil it and which type to use. This simple step can help prolong the life of your Singer Stitch Sew Quick Portable Mending Machine.
Additionally, always store your machine correctly when not in use. Keep it covered or in a case to protect it from dust and damage. Avoid storing it near heat sources or direct sunlight, as this can affect its functionality.
Remember to explore all your machine’s features and capabilities. Experiment with different fabrics and projects to truly understand what this portable mending machine can achieve.