


Sergers & Overlock Machines


Detail Description
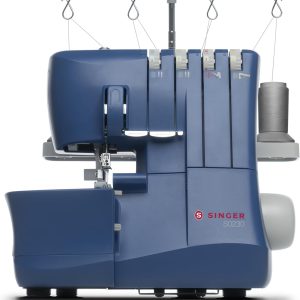
Mastering the Singer Sewing Serger: A Comprehensive Guide for Beginners
Welcome to the world of sewing mastery! If you’ve ever dreamed of taking your fabric projects from ordinary to extraordinary, a Singer sewing serger could be your new best friend. This powerful machine doesn’t just sew; it trims and finishes seams precisely, giving your creations that professional touch. Whether you’re a complete novice or someone looking to enhance their skills, this guide will illuminate everything you need to know about harnessing the full potential of a Singer sewing serger. Get ready to unlock new possibilities in your crafting journey!
Benefits of Using a Serger Machine
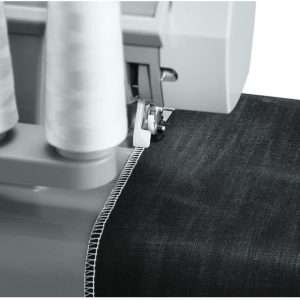
Using a serger machine opens up possibilities for any sewing enthusiast. These machines are designed to create clean, finished edges that prevent fraying. This feature alone can elevate your projects and ensure durability.
Speed is another significant advantage. Sergers sew multiple threads simultaneously, allowing you to complete tasks faster than a traditional sewing machine. Imagine finishing hems or seams in half the time!
Versatility is also key. A Singer sewing serger can handle various fabrics—from delicate silks to sturdy denims—making it perfect for diverse projects.
The variety of stitch options available on a serger offers creative freedom. You can explore decorative finishes or functional stitches that enhance your work’s look and strength, expanding your crafting horizons like never before!
Features to Look for in a Serger Machine
Certain features can significantly enhance your sewing experience when selecting a Singer sewing serger.
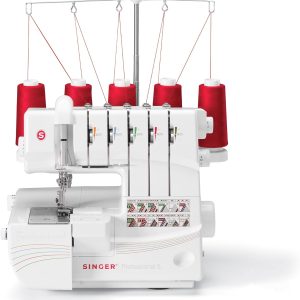
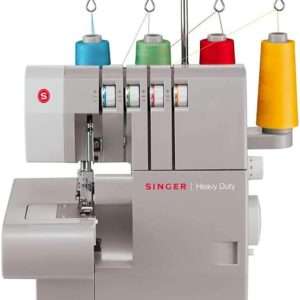
Look for one with multiple thread options. A machine offering 2, 3, 4, or more threading capabilities allows for versatile stitch types and finishes. This flexibility is crucial for various fabric projects.
Another must-have feature is an adjustable stitch length and width. These adjustments let you customize stitches to suit different fabrics and techniques, ensuring professional results every time.
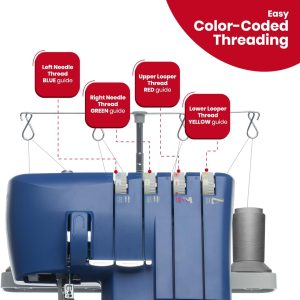
Consider the ease of use as well. Features like color-coded threading paths simplify setup, making it user-friendly for beginners.
Built-in rolled hem capability can save time when finishing edges neatly without additional attachments. Many enthusiasts appreciate this convenient option.
Ensure that your chosen model has sufficient power and speed settings to easily handle diverse materials while maintaining quality stitching throughout each project.
How to Set Up and Thread a Singer Sewing Serger
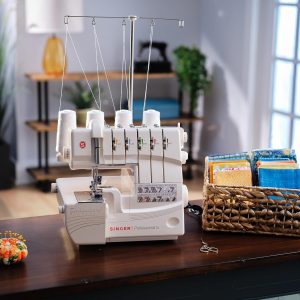
Setting up a Singer sewing serger may seem daunting, but it’s pretty straightforward and requires some practice. Start by placing your machine on a sturdy table, ensuring you have ample space to work.
Next, gather your materials: thread spools and fabric. Please ensure the threads are in their designated spots on the spool pins.
Follow the color-coded guides usually printed on the serger itself to thread the machine. Each thread has its path; take your time to ensure accuracy. Raising the presser foot while threading helps create slack in the tension discs.
Once threaded, gently pull each thread through until they reach their respective needles and loopers. After everything is in place, test with scrap fabric before diving into your project for peace of mind and smooth operation.
Understanding the Different Stitch Options
A Singer sewing serger opens up a world of stitching possibilities. Each stitch serves its purpose, transforming your projects.
The most common is the 4-thread overlock stitch. It provides durability and stretch—perfect for knits or woven fabrics.
Then there’s the rolled hem stitch, which creates delicate edges on lightweight materials. This option adds a polished finish to scarves or table linens.
For decorative touches, you can explore flatlock stitches. These are ideal for creating flat seams while showcasing contrasting thread colors.
Take notice of the chain stitch, too! It’s excellent for quick basting or gathering fabric without permanent attachment.
Understanding these options allows you to select the proper technique for each project, elevating your sewing game from basic to brilliant. Experimenting with different threads and tensions will also help reveal unique textures and effects,
Tips and Tricks for Perfecting Your Serger Skills
To truly master your Singer sewing serger, you must embrace a few tips and tricks that can elevate your skills. First, always keep the manual handy. It’s packed with valuable information tailored specifically for your model.
Practice is key! Start with scraps of fabric before diving into actual projects. This will help you get comfortable with threading and tension adjustments without the pressure of ruining a finished piece.
Experimenting with different stitch types will also broaden your capabilities. Try out rolled hems, flatlock stitches, and even decorative edges to see how they enhance your projects.
Regular maintenance is also crucial. Use a small brush or compressed air regularly to keep the machine clean from lint and dust build-up. A well-maintained serger performs better and lasts longer.
Don’t hesitate to watch tutorial videos online or join sewing communities where you can ask questions and share experiences. Learning from others can provide insights that books sometimes miss.
Be patient with yourself as you learn this powerful tool in garment-making or home decor projects. With practice comes proficiency—and soon enough, you’ll find that mastering the Singer sewing serger opens up a world of creative possibilities.