Mastering Precision: A Comprehensive Guide to the Singer Sewing Foot
Sewing enthusiasts know that the right tools can make all the difference in crafting beautiful pieces. The Singer sewing foot stands out as a game-changer among these essential tools. With various styles designed for different techniques and projects, mastering this tool can elevate your sewing experience from ordinary to extraordinary. Whether you’re a novice keen on learning or an experienced seamstress looking to refine your skills, understanding how to use your Singer sewing foot effectively is critical. Let’s dive into the world of sewing feet and unlock their full potential!
Types of Singer Sewing Feet
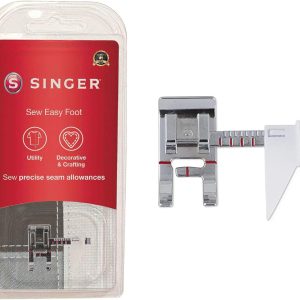
Singer sewing feet come in various types, each designed for specific tasks. The all-purpose foot is a staple for everyday sewing needs. It’s versatile and works well with most fabrics.
The walking foot is essential for quilters. This foot helps manage multiple layers of fabric and prevents shifting while sewing.
The zipper foot allows you to insert zippers with precision. Its unique design lets you stitch near the zipper teeth without fuss.
The satin stitch foot is your friend if you’re into decorative stitching. It enhances intricate designs by guiding your fabric smoothly under the needle.
Don’t overlook specialty feet like the free-motion quilting or blind hem foot. Each one opens up new creative possibilities and techniques for every project on your list!
Benefits of Using a Singer Sewing Foot
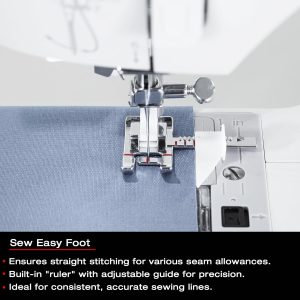
Using a Singer sewing foot can transform your sewing experience. These specialized feet provide precision that enhances every stitch.
They allow for greater control, making sewing curves or straight lines easier. This results in cleaner finishes and more professional-looking projects.
With various types available, you can effortlessly tackle different fabrics and techniques. Whether you’re quilting, hemming, or appliquéing, there’s a specific foot designed to meet your needs.
Moreover, using the correct sewing foot reduces fabric puckering and misalignment. It saves time by eliminating the need for constant adjustments while you work.
Many find that their creativity flourishes with the right tools at hand. A singer-sewing foot simplifies tasks and inspires new ideas for projects you’ve always wanted to try.
How to Use a Singer Sewing Foot: Step-by-Step Guide
To use a Singer sewing foot, ensure your machine is turned off. This prevents any accidental movements while you work.
Next, remove the existing presser foot. Most models have a lever at the back for easy detachment. Once it’s off, align your chosen sewing foot with the shank and gently lower it into place until you hear a click.
After securing the new foot, adjust its settings based on your project type. For instance, switch stitch types accordingly if you’re using a zipper foot for installing zippers or an edge-stitching foot for precise seams.
Now thread your fabric under the presser foot and lower it onto your material. Start slowly to get comfortable with how the sewing foot guides the fabric as you sew.
Remember to watch tension settings, too; this can significantly affect stitching quality throughout your project.
Troubleshooting Common Issues with the Singer Sewing Foot
When using your Singer sewing foot, you might encounter a few hiccups along the way. One common issue is skipped stitches. This can occur if the needle needs to be correctly installed or worn out. Always check that your needle is securely in place and replace it regularly.
Another problem could be uneven fabric feeding. If you notice puckering or shifting, ensure your presser foot pressure is correctly adjusted for different fabrics.
Thread bunching underneath the fabric can also be frustrating. This often means that the thread tension needs adjusting. Before starting your project, test on a scrap piece to find the right balance.
Don’t forget about compatibility issues with various foot attachments; not all are designed for every machine model, so double-check specifications to avoid complications during use.
Creative Projects You Can Do with a Singer Sewing Foot
The versatility of the Singer sewing foot opens up a world of creative possibilities. Whether you’re a beginner or an experienced sewist, countless projects await you.
Using walking feet, you can start creating beautiful quilts with precision and ease. They help evenly feed multiple layers of fabric, ensuring that your quilt top aligns perfectly with the batting and backing material.
If you want to add decorative touches to your garments, consider using embroidery or satin stitch feet. These specialized attachments allow you to experiment with intricate designs and shapes, giving your clothing a unique flair.
Try making cushion covers or window treatments for those interested in home decor. The zipper foot is perfect for inserting zippers neatly into cushions while keeping seams clean and professional-looking.
Remember to craft accessories like bags or wallets! A clear view foot lets you see exactly where you’re stitching on transparent vinyl materials—perfect for stylish yet functional creations.
Let your creativity flow as you explore new techniques and styles. With the right Singer sewing foot at hand, every project becomes an opportunity for innovation and personal expression. Dive in, experiment boldly, and enjoy each stitch along the way!