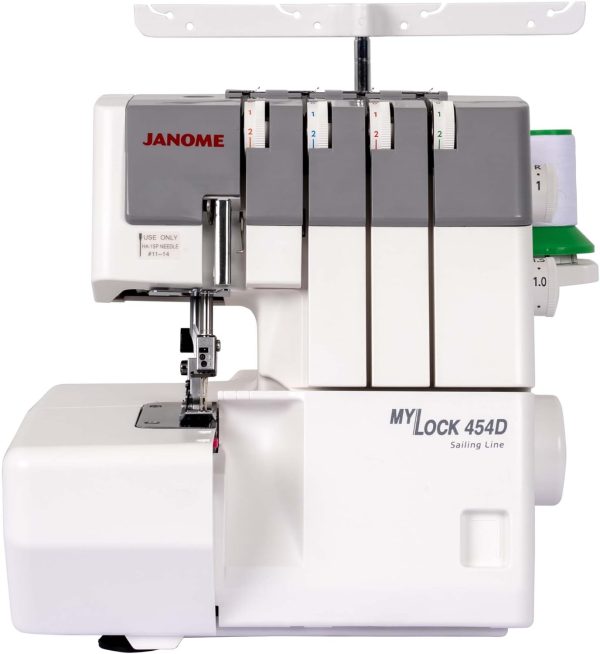
Sergers & Overlock Machines
Detail Description
Serging Simplified: A Beginner’s Guide to Mastering Your First Sergers
Are you ready to take your sewing projects to the next level? You may have heard whispers about sergers if you’ve been dabbling in DIY fashion or home décor. These powerful machines can transform your fabric edges into beautifully finished seams, giving your creations a professional touch. But if the thought of using a serger seems daunting, don’t worry! This beginner’s guide will walk you through everything you need to know. From understanding the benefits and types of sergers to mastering essential techniques, you’ll soon be on your way to becoming a confident user. Let’s dive into the world of sewing for beginners and unlock new possibilities in your sewing journey!
Benefits of using a serger
Sergers offer a range of benefits that elevate your sewing game. One significant advantage is speed. You can stitch and finish seams swiftly with a serger, saving valuable project time.
Another perk is the professional finish they provide. Serged edges are neat and durable, preventing fraying over time. This means your garments will look polished and withstand wear and tear.
Flexibility is another critical benefit. Most sergers allow for various stitch options, giving you the freedom to experiment with different techniques, such as rolled hems or flatlock stitches.
Additionally, sergers work well with stretchy fabrics. They create seams that stretch without breaking, making them perfect for knits or activewear.
Investing in a serger opens up new creative possibilities while enhancing the quality of your sewing projects.
Different types of sergers and their functions
When diving into the world of sergers, it’s essential to understand the different types available. Each serves a unique purpose and caters to various sewing needs.
The basic overlock serger is ideal for beginners. It trims and finishes edges in one step, creating a clean look on projects like quilts or garments.
For those looking for versatility, consider a cover stitch machine. This type easily adds professional hems and seams, perfect for knit fabrics.
Then there’s the combo machine. These multi-functional units can seamlessly switch between overlocking and cover stitching, offering flexibility as your skills grow.
Specialized sergers have features tailored for specific tasks—like rolled hems or differential feed settings—that enhance your creativity.
Understanding these options sets the stage for informed decisions in your sewing journey!
Essential tools and materials for using a serger
Having the right tools can make a significant difference when using sergers. First on your list should be a high-quality thread. Unlike ordinary sewing thread, serger threads are designed to withstand tension and create strong seams.
Next, invest in sharp scissors or snips to cut excess fabric and threads cleanly. A seam ripper is also handy; even seasoned sewists make mistakes sometimes.
Remember the needles! Choose ones that fit your specific fabrics and project types. Different needle sizes affect stitch quality.
A good ruler or measuring tape will help ensure precision as you work through patterns. Keep some extra presser feet nearby; these specialized attachments can enhance your capabilities with various stitches and techniques.
By gathering these essential tools, you’ll set yourself up for success as you embark on your journey with sergers for beginners.
Step-by-step guide on how to use a serger
Getting started with your serger is easier than you think. Begin by threading the machine according to its manual. Each thread has a designated path, so take your time.
Once threaded, adjust the tension settings for each spool. A good rule of thumb is to start with all tensions at medium and tweak as needed.
Next, prepare your fabric. Cut it properly and place it under the presser foot without stretching or pulling it too tight.
Now, lower the presser foot and gently press on the pedal. Watch how smoothly it feeds through!
If you’re using a rolled hem or specific stitch type, select that from your machine settings before starting again.
Remember to practice on scrap fabric until you feel comfortable with speed and control. This hands-on experience will build confidence quickly!
Tips for maintaining and prolonging the life of your serger
Taking care of your serger is critical to ensuring it lasts for years to come. Regular maintenance can prevent common issues and keep everything running smoothly.
Start by keeping your work area clean. Dust and fabric scraps can accumulate in the machine, leading to jams or malfunctions. A quick wipe-down after each project helps maintain its performance.
Next, regularly change the needles. Dull or damaged needles can cause skipped stitches or uneven seams, so make this a routine part of your sewing sessions. Using the correct needle type for different fabrics is crucial for achieving quality results.
Lubrication is another critical factor. Refer to your serger’s manual for guidance on how often you should oil it and where to apply lubrication. This will help reduce friction between moving parts and extend its lifespan.
Thread tension needs attention, too; check that it’s set correctly before starting any project. Incorrect tension settings may lead to puckered seams or looping threads, which can be frustrating—especially when you’re just starting!
Be sure to store your serger properly when not in use. A protective case will shield it from dust and accidental bumps that could damage delicate components.
Don’t hesitate to consult the user manual whenever you have questions about upkeep or usage specifics tailored just for your model—it’s an invaluable resource!
By consistently following these tips, you and your serger will create a positive environment as you embark on many creative projects.


