

Sergers & Overlock Machines
Sergers & Overlock Machines
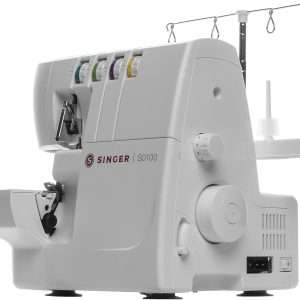
SINGER | S0100 White Overlock Serger with 2/3/4 Thread Capacity and 1300 SPM
Mastering the Art of Serger Threading: A Step-by-Step Guide for Beginners
Are you ready to unlock the secrets of serger threading? You’ve been alone if you’ve ever felt overwhelmed by your machine. Many beginners find themselves tangled in a web of threads and confusion. But don’t worry! This guide will help demystify the threading process, transforming it from a daunting task into an achievable skill.
Imagine quickly whipping up perfectly finished seams, all thanks to mastering your capabilities. Whether you’re looking to enhance your sewing projects or want to tackle that pile of fabric waiting for attention, understanding how to thread your serger is essential. Let’s dive into this journey together and turn those threads into masterpieces!
Understanding the Parts of a Serger Machine
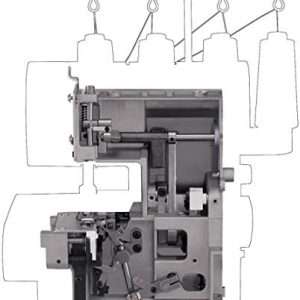
To master serger threading effectively, it is crucial to familiarize yourself with the components. A serger typically features multiple threads that work in harmony to create professional finishes.
The upper looper and lower looper are vital players. They interlock your threads, giving you that signature overlocked edge. Understanding their positions will help simplify the threading process.
Next is the needle—most sergers use two or three of them, depending on your project needs. Each needle serves a specific purpose in creating different stitch types.
Remember the thread tension dials! Adjusting these can significantly impact how your fabric feeds and stitches form.
Examine the presser foot and knife blade carefully. They guide the fabric into place while simultaneously trimming excess material. Knowing each component’s role lays a solid foundation for confident sewing adventures.
Gathering Your Supplies
Gathering all your supplies before starting serger threading is essential. This preparation will make the process smoother and more enjoyable.
Start with your serger machine itself. Ensure it is clean and well-maintained for optimal performance. Next, check that you have the correct type of thread for your project—polyester or cotton usually works best.
Don’t forget scissors! A sharp pair is crucial for cutting threads cleanly as you work. Also, keep a seam ripper handy if things don’t go as planned.
Make sure to have spare needles on hand, too. Having the right size needle can prevent many issues while sewing.
Consider using tweezers and a flashlight if needed. These tools help reach tight spots and illuminate any dark areas inside the machine.
Step-by-Step Guide to Threading a Serger Machine
Start by ensuring your serger is powered off. Safety first!
Next, raise the presser foot. This allows you to thread the machine easily without tension issues.
Locate the threading order on your machine; it usually includes color-coded paths for clarity. Follow this guide meticulously.
Begin with the upper looper thread. Insert it through its designated tension disk and follow the path to the looper arm.
Now, similarly tackle the lower looper thread—through its tension disk and along its route.
Next, proceed to both needle threads, remembering that they often have separate guides above them. Thread each needle while keeping an eye on their respective tensions.
Trim all excess threads before gently pulling on each one to ensure proper seating as you close up any components of your serger ready for use.
Advanced Techniques and Tips for Perfecting Your Serger Threadwork
Mastering serger threading is an essential skill for any sewing enthusiast. Once you have the basics, explore advanced techniques to elevate your projects.
One effective method is to use a different color thread for each needle and looper. This way, if problems arise, you can quickly identify which thread needs adjusting. It also helps you visualize how your machine works as you make adjustments.
Consider experimenting with tension settings as well. Each fabric type may require different tension levels to achieve the best finish. Keep a noteboo k handy to jot down successful settings for future reference.
Another helpful tip involves using leader threads when starting a new project or changing colors. This technique minimizes waste and ensures better stitching without starting on the actual fabric piece immediately.
Always keep your serger clean and well-maintained. Regularly checking for lint buildup and replacing needles will ensure smooth operation whenever you sew.
By incorporating these tricks into your routine, you’ll streamline your serger threading process and enhance the quality of your finished products. Happy sewing!