

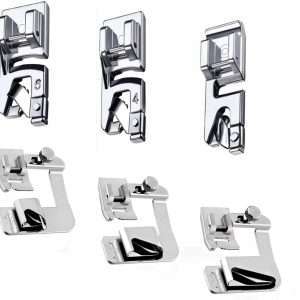
![Rolled Hem Presser Foot [6 Sizes] Wide Rolled Hem Foot Set & Narrow Foot Hemmer Set For Brother, Singer & Janome Low Shank Sewing Machines. Hemming Pressure Feet With Distinctive - 1](https://americansewingmachine.net/wp-content/uploads/2026/02/Rolled-Hem-Presser-Foot-6-Sizes-Wide-Rolled-Hem-Foot-Set-Narrow-Foot-Hemmer-Set-For-Brother-Singer-Janome-Low-Shank-Sewing-Machines.-Hemming-Pressure-Feet-With-Distinctive-1-300x300.jpg)
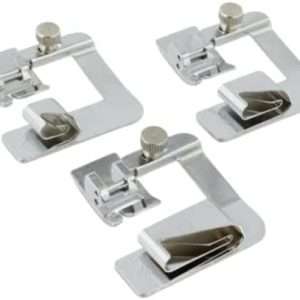
![Rolled Hem Presser Foot [6 Sizes] Wide Rolled Hem Foot Set & Narrow Foot Hemmer Set For Brother, Singer & Janome Low Shank Sewing Machines. Hemming Pressure Feet With Distinctive - 7](https://americansewingmachine.net/wp-content/uploads/2026/02/Rolled-Hem-Presser-Foot-6-Sizes-Wide-Rolled-Hem-Foot-Set-Narrow-Foot-Hemmer-Set-For-Brother-Singer-Janome-Low-Shank-Sewing-Machines.-Hemming-Pressure-Feet-With-Distinctive-7-300x300.jpg)


Detail Description
Mastering the Hem: A Comprehensive Guide to Using a Hemmer Sewing Foot
Do you long for flawless hems on your sewing projects? Are you seeking a way to effortlessly achieve that polished, high-end look? If this sounds familiar, then the hemmer sewing foot could be the solution you’ve been searching for. This versatile tool has the power to elevate your sewing abilities and elevate your pieces from basic to couture-worthy. Regardless of your level of experience, mastering the hemmer foot can save you countless hours and minimize frustration while adding a touch of sophistication to your garments. Let’s delve into this all-inclusive guide and unlock the full potential of this must-have accessory!
Different Types of Hemmer Sewing Feet
Hemmer sewing feet come in various types, each designed to tackle different hemming needs. The most common type is the single-fold hemmer foot. It creates a clean edge suitable for lighter fabrics like cotton or silk.
Then there’s the double-fold hemmer foot. This one folds the fabric twice before stitching, perfect for heavier materials such as denim or canvas. It provides extra durability and a polished look.
A rolled hem foot is your best friend for working with curved hems. It rolls and stitches simultaneously, making it ideal for delicate fabrics like chiffon or organza.
Some advanced models even feature adjustable widths, allowing you to customize your hems further! Each tool can transform how you approach sewing projects and help ensure consistent results whenever you sit at your machine.
Benefits of Using a Hemmer Sewing Foot
Using a hemmer sewing foot streamlines the hemming process. It creates perfectly even hems, enhancing your garments’ overall appearance. This tool is designed to fold and stitch fabric edges efficiently.
Precision is another significant advantage. The guide channels help maintain a consistent width for every hem, making achieving professional finishes at home easier.
Time-saving features are also worth noting. With a hemmer sewing foot, what used to take hours can be completed in minutes. You’ll find yourself finishing projects faster without sacrificing quality.
Additionally, this accessory opens doors to creativity. Experiment with different fabrics and styles while enjoying the ease of maintaining neat edges on all your creations. Whether you’re delving into homemade garments or simple repairs, a hemmer sewing foot is indispensable for any sewer’s toolkit.
Step-by-Step Guide to Using a Hemmer Sewing Foot
Start by gathering your materials. You’ll need fabric, a hemmer sewing foot, and your machine.
Next, prepare the fabric. Trim any raw edges first. Then, press up the hem to create a clean line. This will help guide you as you sew.
Attach the hemmer foot to your machine following its specific instructions. Set your stitch width according to your desired finish.
Feed the edge of the fabric into the foot’s slot carefully. As you sew, gently pull on both sides of the fabric to even create tension.
Keep an eye on how the fabric rolls underfoot; this ensures a consistent fold throughout. Adjust speed if necessary for more delicate fabrics.
Once done, remove excess threads and press it again with an iron for a polished look. Enjoy wearing or showcasing your beautifully finished project!
Troubleshooting Common Issues
Troubleshooting common issues with a hemmer sewing foot can save you time and frustration. First, if your fabric is not feeding smoothly, check the tension settings on your machine. Adjusting the tension can often resolve any puckering or uneven hems.
If you’re experiencing skipped stitches, ensure the needle is in good condition. A bent or dull needle can cause problems with accuracy when using a hemmer foot. Replacing it might do the trick.
Another frequent issue involves misaligned hems. This could be due to improper placement of the fabric under the foot. Take extra care to align everything correctly before starting to sew.
If you notice excess bulk at corners or curves, try trimming away some of the fabric underneath for smoother transitions. These simple adjustments will help you achieve cleaner results when using your hemmer sewing foot.
Creative Ways to Use a Hemmer Sewing Foot
The hemmer sewing foot is not just a tool for creating perfect hems. Its versatility allows you to explore various creative projects that can elevate your sewing game.
One clever use is making fabric napkins or tablecloths with beautiful, finished edges. The accuracy of the hemmer foot ensures that each piece looks polished and professional. You can experiment with fabric types, from delicate linens to sturdy cotton.
If you’re interested in garment construction, consider using the hemmer foot for embellishments like ruffles or decorative seams on skirts and blouses. This add-on can create evenly finished flounces that add flair to your clothing.
Another innovative application is crafting accessories such as tote bags or pouches. The hemmer foot can be used to finish raw edges quickly while maintaining a clean look—perfect for those who want their handmade items to stand out.
For quilting enthusiasts, this tool also comes into play when binding quilts. A well-finished edge enhances durability and adds aesthetic appeal.
Remember home decor projects! Cushion covers and curtains benefit greatly from neat hemlines created by a hemmer sewing foot, giving your living spaces an inviting touch.
Embracing these creative avenues will inspire you to make the most of your hemmer sewing foot while expanding your skills and enhancing your craft collection.