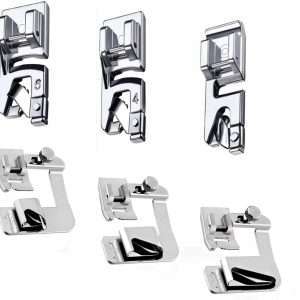

Detail Description
Get Perfect Hems Every Time with a Hem Foot for Your Brother Sewing Machine
Is your sewing project looking out of place because of uneven hems? Get rid of crooked edges and say hello to perfectly finished hems with the Brother hem foot! Learn how this simple tool can elevate your sewing skills to the next level, ensuring professional results every time. Find out how to achieve flawless hems effortlessly with this guide.
How to attach and use a hem foot on your Brother sewing machine
Attaching a hem foot to your Brother sewing machine is a game-changer for achieving professional-looking hems. Select the correct size hem foot for your project, ensuring a snug fit on the presser foot holder. Once attached securely, adjust the needle position to align perfectly with the guide on the hem foot.
Using a hem foot is simple yet effective. Start by folding your fabric at the desired hem width and feeding it under the presser foot. The guide on the hem foot will help keep your fabric straight as you stitch along, effortlessly creating crisp and even hems.
Practice makes perfect when using a hem foot. Experiment with different fabrics and settings on scrap pieces before working on your final project for flawless results. Don’t rush; take your time to feed the fabric steadily through while guiding it smoothly along the edge of the folded hem.
With patience and practice, attaching and using a hem foot on your Brother sewing machine will soon become second nature. This will elevate your sewing projects with neat, professional finishes that are sure to impress!
Tips for achieving perfect hems every time
Precision is critical when it comes to achieving perfect hems with your Brother sewing machine and hem foot attachment. Start by selecting the appropriate stitch length and width on your machine for the fabric you are working with. This will ensure that your hem stays in place without puckering or stretching.
Before starting to sew, press your fabric thoroughly to create a crisp edge for easier folding. Using pins or clips to secure the folded fabric in place can also help maintain even hems throughout your project.
Take your time while sewing, guiding the fabric smoothly through the hem foot to prevent any unevenness or bunching. Remember to backstitch at the beginning and end of each seam for added durability.
If you encounter any corners or curves while hemming, pivot gently around them to maintain a consistent edge. Practice makes perfect, so don’t get discouraged if your first few attempts aren’t flawless—keep honing your skills until you achieve picture-perfect hems every time!
Creative ways to use a hem foot for different sewing projects
Whether you’re a seasoned seamstress or just starting out, the hem foot for Brother sewing machines is a versatile tool that can elevate your projects to the next level. By mastering the art of attaching and using the hem foot correctly, you can achieve perfect hems every time, adding a professional finish to your garments and home decor items.
In addition to traditional hems, think outside the box and get creative with your hem foot. Experiment with different fabrics, stitch lengths, and techniques to create unique designs like decorative trims, ruffles, pintucks, and more. Let your imagination run wild as you explore the endless possibilities a hem foot can offer for all your sewing projects.
With practice and patience, you’ll soon discover that the humble hem foot is not just a tool for finishing edges but a gateway to unleashing your creativity in ways you never imagined. So dust off your Brother sewing machine, grab your hem foot attachment, and embark on a journey of innovation and inspiration in every stitch. Happy sewing!