
Sergers & Overlock Machines
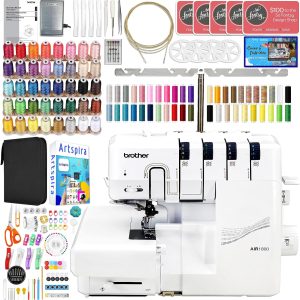
Brother Air1800 Air Serger with Jet-Air Threading and 250+ Accessories including 83 Spools of Thread


Sergers & Overlock Machines
Brother Air1800 Air Serger with Jet-Air Threading Bundle and 80 Spool Thread Kit


Sergers & Overlock Machines
Brother AIR1800 Air Serger with Jet Air Threading, 2/3/4 Thread, LED Lit Work Area


Detail Description
Unlocking the Potential of Your Brother Serger Machine: A Comprehensive Guide for Beginners
If you’ve recently brought home a Brother serger machine, congratulations! You’re about to unlock a world of creativity and efficiency in your sewing projects. This versatile tool can elevate your crafting game, whether hemming garments, creating professional-looking seams, or diving into embellishments. With its ability to cut fabric edges while stitching them together, your Brother serger is more than just an ordinary sewing machine – it’s a gateway to endless possibilities.
But before you dive headfirst into ambitious projects, it’s essential to understand how this powerful device works. Every detail counts, from setting up your machine correctly to mastering basic stitches and techniques. Whether you’re sewing for fun or aiming for professional results, knowing the ins and outs of your Brother serger will help transform your ideas into reality.
Get ready as we delve deeper into this comprehensive guide explicitly tailored for beginners like yourself. Let’s explore everything from the parts that make up your new favorite tool to troubleshooting tips that will keep things running smoothly on all those creative adventures awaiting you!
Understanding the Parts and Functions of a Serger Machine
Getting familiar with your Brother serger machine starts with understanding its key components. At the heart of it all is the needle, which comes in various sizes for different fabric types.
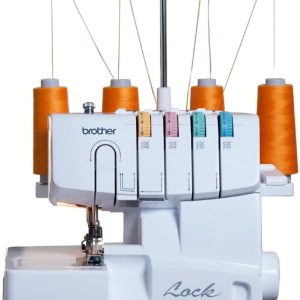
Next up are the loopers—these little guys work behind the scenes to create those beautiful overlock stitches that give your projects a polished finish. The upper looper threads through one side while the lower looper does its magic on the other.
Remember the presser foot! It holds your fabric securely as you sew, ensuring even stitching every time. Adjusting this component can also help you achieve different stitch types.
Then there’s the cutting blade, essential for trimming excess fabric while you sew. This feature not only saves time but also ensures clean edges on all of your creations.
Familiarizing yourself with these parts will boost your confidence and enhance your sewing skills as you embark on new projects!
Choosing the Right Thread and Needles for Your Project
Selecting the right thread and needles is crucial for achieving professional results with your Brother serger machine. Threads come in various materials, including cotton, polyester, and rayon. Each type has its unique characteristics that can affect your project.
Polyester thread is a go-to option for everyday sewing. It offers durability and flexibility, perfect for stretchy fabrics. If you’re working on delicate projects like lace or silk, consider using finer threads to avoid bulkiness.
Needles are equally important. A universal needle works well for most woven fabrics, but switch to a ballpoint needle when dealing with knits or stretch materials. This helps prevent skipped stitches.
Always match your thread size with your fabric weight; heavier fabrics require thicker threads for optimal strength and seam integrity. Careful selection will elevate your work from ordinary to extraordinary!
Setting Up Your Brother Serger for Use
Setting up your Brother serger machine can be daunting but more manageable. Start by finding a clean and spacious workspace. This will help you stay organized while you set everything in place.
Next, carefully unpack your serger and familiarize yourself with the parts. Identify the thread spools, needles, and cutting blade settings to understand what you’ll be working with.
Threading is one of the most crucial steps. For accurate threading routes, follow the color-coded guide that typically comes with your machine. Don’t rush; take your time to ensure each thread is securely placed.
Once threaded, adjust the tension according to your fabric type. A simple test on scrap fabric can fine-tune these settings before starting an actual project.
Plug in your Brother serger machine and power it up! You’re now ready to explore its capabilities as you work on sewing projects.
Basic Stitches and Techniques for Beginners
Starting with basic stitches is essential when using your Brother serger machine. The most common stitch you’ll encounter is the four-thread overlock. This versatile stitch provides a clean edge and prevents fraying, making it perfect for knit fabrics.
Next up is the three-thread overlock stitch. It’s lighter than its four-thread counterpart and works wonderfully on lightweight materials. It’s excellent for seams where you want flexibility without added bulk.
Don’t shy away from experimenting with rolled hems, either! This technique creates delicate edges that are ideal for sheer fabrics like chiffon or lace.
Practice gathering fabric by adjusting the differential feed settings. This allows you to effortlessly create ruffles, adding texture to your projects.
Each technique can elevate your sewing game while giving you confidence in mastering your Brother serger machine.
Advanced Features and Techniques to Explore
The Brother serger machine has advanced features that can elevate your sewing projects. One such feature is the differential feed system, which allows you to adjust the fabric feeding ratio. This helps prevent puckering on delicate fabrics and ensures smooth stitching.
Another remarkable capability is rolled hems. You can create beautifully finished edges on lightweight materials with a simple adjustment. This technique is perfect for finishing scarves or table linens.
You might also explore color-coding your threads for easier setup and maintenance. Color-coded threading guides simplify the process, reducing frustration when switching colors or types of thread.
Pay attention to specialty foot attachments like the gathering foot or piping foot. These tools expand your creative possibilities, enabling unique designs and finishes that stand out in any project. Experimenting with these techniques will enhance your skills while showcasing what makes your brother’s serger machine so versatile.
Creative Projects to Try with Your Brother Serger Machine
Your Brother serger mach ine opens up a world of creative possibilities. It’s not just about finishing seams; it can be the key to unlocking your sewing potential. Here are some fun projects to get you started.
Consider making simple garments like t-shirts or leggings. The stretch stitches on your serger will give these items a professional finish, allowing flexibility and comfort.
Home decor is another great avenue to explore. Cushions, table runners, or even curtains can all benefit from the clean edges that a serger provides. Plus, it adds an extra layer of durability.
If you’re feeling adventurous, try creating accessories like bags or hats. These small projects are perfect for testing out different techniques without overwhelming yourself.
Remember scrap fabric! Use leftover pieces to practice various stitches and settings on your Brother serger machine before moving on to larger projects.
Consider exploring upcycling ideas—transform old clothes into something new and stylish with the help of your serger’s capabilities.
Once you familiarize yourself with this versatile tool, your creativity will be unlimited. Embrace the journey, and let your imagination run wild!