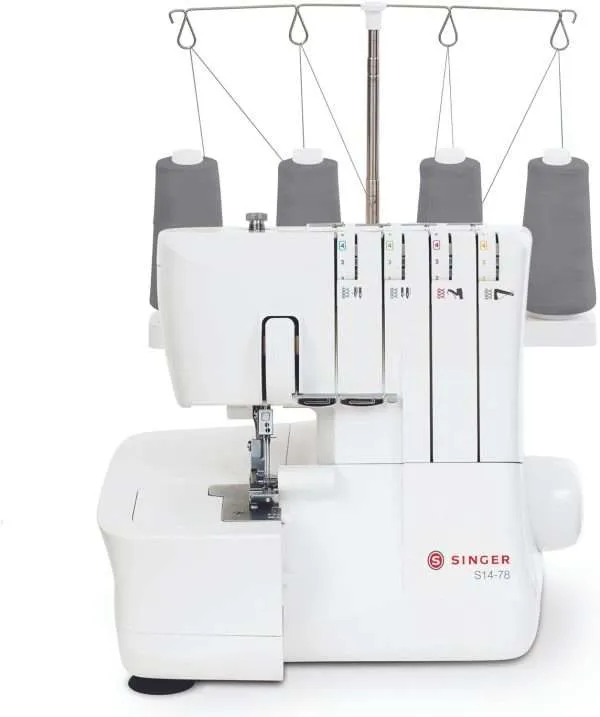
Sergers & Overlock Machines
Detail Description
Serging 101: A Beginner’s Guide to Mastering Your First Sergers
Are you ready to take your sewing skills to the next level? If you’ve been eyeing that sleek machine sitting in the corner of your craft room, it’s time to dive into the world of serging. A basic serger can revolutionize how you finish seams and create professional-looking garments. Whether you’re a complete beginner or someone looking to refine your technique, mastering this handy tool opens up a new realm of possibilities for all your creative projects.
Imagine crisp edges, beautifully finished hems, and intricate patterns coming together effortlessly. With just a bit of guidance, you’ll be well on your way to becoming confident with your first serger. Let’s explore everything you need to know about getting started!
Benefits of Using a Serger
Using a serger has a host of benefits that can elevate your sewing experience. First and foremost, it provides professional-grade seam finishes. The overlocking stitch prevents fraying and gives garments a polished look.
Speed is another enticing factor. Sergers can sew and finish edges simultaneously, significantly reducing project time. This efficiency allows you to tackle larger tasks or create more items in less time.
Serger machines are versatile, too. They can handle various fabrics—from delicate silks to sturdy denim—making them perfect for diverse sewing applications.
Additionally, many sergers come equipped with differential feed settings, which help manage fabric stretching or puckering during stitching. This ensures smooth results even when working with challenging materials.
Using a serger adds creativity to your work by allowing for unique stitches and embellishments that standard sewing machines can’t replicate.
Understanding the Features and Functions
Understanding serger features is crucial when learning about them. A basic serger typically has four threads, allowing for a variety of stitches. This versatility allows you to tackle multiple fabrics and projects with ease.
Look for adjustable stitch length and width settings. These controls give you more creative freedom when sewing different materials. Differential feed is another essential feature that helps prevent puckering on stretchy fabrics.
Many models include built-in rolled hem capabilities, perfect for neatly finishing edges without the bulk of traditional methods. Additionally, some machines have color-coded threading guides to make setup easier.
Don’t overlook presser foot options, either. They can significantly enhance your sewing experience by accommodating various techniques like gathering or piping. Familiarizing yourself with these functions will set a strong foundation as you embark on your journey into serging.
Tips for Setting Up Your First Serger
Setting up your first serger can feel overwhelming, but it’s simpler than you might think. Start by reading the manual carefully. Each machine has unique features and threading paths.
Next, gather all the necessary tools nearby—scissors, thread, and fabric scraps. This will streamline your setup process.
Threading is critical to successful serging. If available, follow a color-coded guide; it makes everything clearer. Don’t rush—take your time to ensure each thread is in its designated spot.
Before cutting into a project, practice on scrap fabric. This will help you become comfortable with adjusting tension and stitch length settings based on different materials.
Get cozy with the foot pedal control. A gentle touch can make a huge difference as you learn to maneuver through curves and corners smoothly while serging.
With these tips, you’ll be well at mastering that basic serger!
Basic Stitching Techniques with a Serger
Mastering basic stitching techniques with a serger opens endless sewing possibilities. One of the first stitches you’ll want to try is the three-thread overlock. This stitch provides a clean finish for seams, preventing fraying while maintaining fabric stretch.
Next is the four-thread overlock, which is ideal for adding durability and strength to your projects. It combines two stitching lines on top with an additional thread beneath, ensuring your seams withstand wear and tear.
Remember, rolled hems! This technique creates a narrow hem perfect for lightweight fabrics like chiffon or silk. It adds elegance without bulk.
Experimenting with these techniques helps you understand tension settings and threading methods unique to each stitch. Embrace small practice swatches as you navigate various fabrics and styles; they are your best friends when mastering this tool!
Advanced Techniques and Projects with a Serger
Once you’ve mastered the basics, it’s time to explore advanced techniques that can elevate your projects. Consider experimenting with rolled hems for lightweight fabrics. This technique creates a beautiful finish on sheer materials and is perfect for summer dresses.
Another exciting project is creating knits using a serger. The differential feed feature allows you to work with stretchy fabrics without distortion. You can make fitted tops or cozy leggings effortlessly.
Don’t shy away from decorative stitches, either! Incorporate contrasting thread colors or unique stitch patterns to add flair to your creations.
You could also tackle more complex items such as quilts or bags, utilizing the serger’s speed and efficiency to handle multiple layers of fabric seamlessly. Each project will build your confidence while showcasing the versatility of this incredible machine.
Maintenance and Care Tips for Your Serger
Taking care of your serger is essential for keeping it in top shape and lasting. Regular maintenance will help you avoid common issues and keep your stitching smooth.
First, make a habit of cleaning your serger after each use. Dust, fabric fibers, and lint can accumulate quickly around the feed dogs and inside the machine. Use a small brush or a vacuum attachment to remove debris from these areas.
Next, check your blades regularly. Dull blades can lead to uneven cuts and frustrating sewing experiences. If you notice any fraying or difficulty cutting through the fabric, it may be time to replace them.
Lubrication is another crucial aspect of maintaining your basic serger. Refer to the manufacturer’s instructions on how often to oil specific machine parts. This will keep the moving components running smoothly.
When not in use, always store your serger in a clean, dry place. A dust cover can protect it from dirt while keeping moisture at bay.
If problems arise during operation, familiarize yourself with troubleshooting tips outlined in the manufacturer’s manual or online resources. Being proactive about maintenance ensures you’ll enjoy many successful sewing projects ahead!

